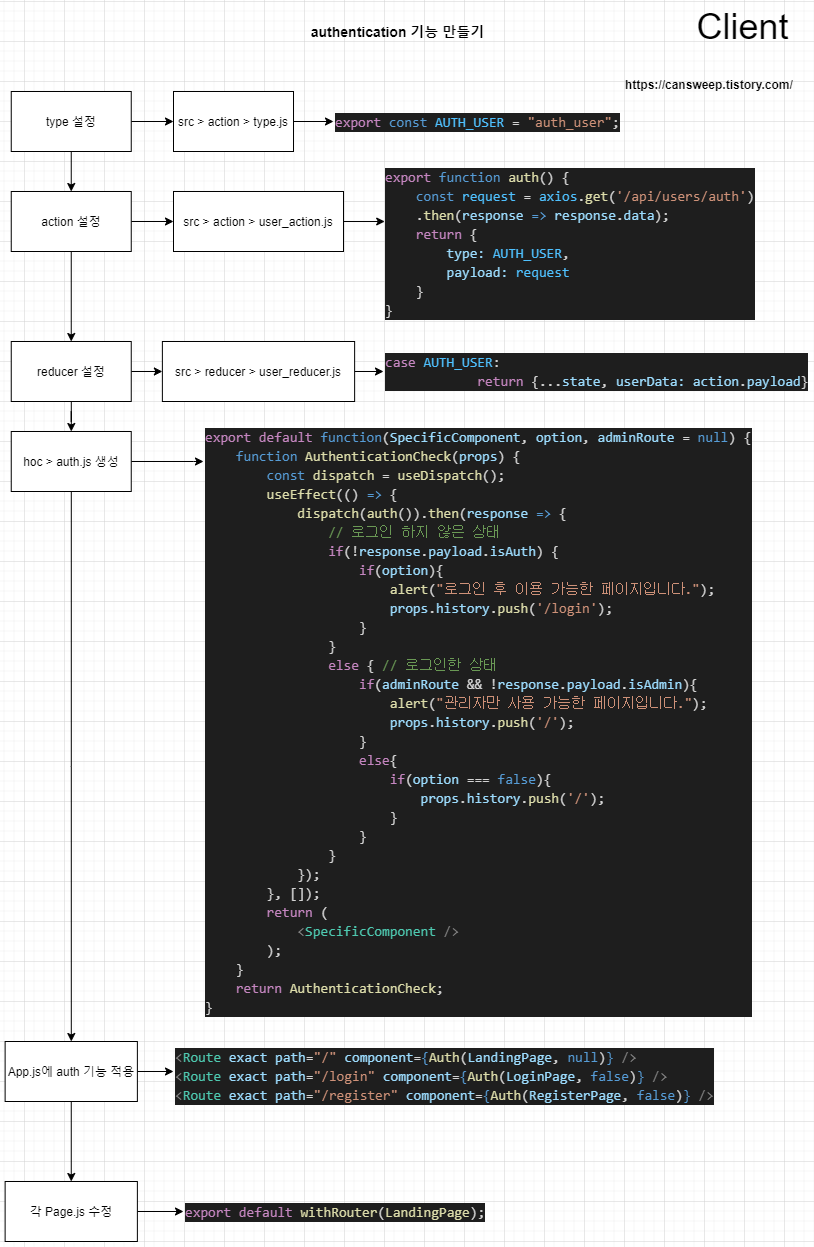
따라하며 배우는 노드, 리액트 기본 강의를 듣고 정리한 내용입니다.

Authentication 기능을 위한 Redux 설정하기
1. type 설정
src > action 폴더의 type.js에 Auth 기능을 위한 type을 설정한다.
export const AUTH_USER = "auth_user";
2. auth action 구현
src > action 폴더의 user_action.js에 auth를 위한 요청을 서버에 보내는 작업을 구현한다.
import axios from 'axios';
import {
    AUTH_USER
} from './types';

export function auth() {

    const request = axios.get('/api/users/auth')
    .then(response => response.data);

    return {
        type: AUTH_USER,
        payload: request
    }
}
axios.get()을 이용하여 서버에서 받은 data를 request에 저장한다.
이후 action의 타입과 request를 return 시킨다.
3. auth reducer 구현
src > reducer 폴더의 user_reducer.js에 auth reducer를 구현한다.
import {
    LOGIN_USER,
    REGISTER_USER,
    AUTH_USER
} from '../_actions/types';

export default function(state={}, action) {
   switch (action.type) {
        case LOGIN_USER:
            return {...state, loginSuccess: action.payload}

        case REGISTER_USER:
            return {...state, register: action.payload}

        case AUTH_USER:
            return {...state, userData: action.payload}

        default:
            return state
    }
}
앞선 기능 구현때와 마찬가지로 각 action의 타입에 따라 서버로부터 받은 내용을 userData에 저장 후 state와 함께 return한다.
서버 구현 시 요청에대한 응답으로 user 정보들을 보내도록 했기 때문에 userData에는 user에 대한 정보들이 담길 것이다.
Authentication 기능 구현하기
1. auth.js 구현
hoc 폴더 생성 후 그 안에 auth.js 파일을 생성한다.
import React, { useEffect } from 'react';
import { useDispatch } from 'react-redux';
import { auth } from '../_actions/user_action';

export default function(SpecificComponent, option, adminRoute = null) {

    function AuthenticationCheck(props) {

        const dispatch = useDispatch();

        useEffect(() => {
            dispatch(auth()).then(response => {

                // 로그인 하지 않은 상태
                if(!response.payload.isAuth) {
                    if(option){
                        alert("로그인 후 이용 가능한 페이지입니다.");
                        props.history.push('/login');
                    }
                }
                else { // 로그인한 상태
                    if(adminRoute && !response.payload.isAdmin){
                        alert("관리자만 사용 가능한 페이지입니다.");
                        props.history.push('/');
                    }
                    else{
                        if(option === false){
                            props.history.push('/');
                        }
                    }
                }
            });
        }, []);

        return (
            <SpecificComponent />
        );
    }

    return AuthenticationCheck;
}
인자로 component와 option, adminRoute를 받는다.
option은 다음과 같다.
- option = null : 아무나 출입 가능
- option = true : 로그인한 유저만 출입 가능
- option = false : 로그인한 유저는 출입 불가
adminRoute는 true일 경우 admin user만 출입 가능하다.
하지만 boilerplate에서는 admin user를 따로 지정하지 않았기에 null을 준다.
구현하고자 하는 내용은 다음과 같다.
- 로그인하지 않은 상태로 로그인 후 이용가능한(option = true) 페이지에 접근할 경우 : 안내 메세지를 출력하고 LoginPage로 이동시킨다.
- 로그인한 상태로 관리자만 이용가능한 페이지에 접근할 경우 : 안내 메세지를 출력하고 LandingPage로 이동시킨다.
- 로그인한 상태로 로그인한 유저는 출입 불가한 페이지에 접근할 경우 (ex. 회원가입페이지, 로그인페이지) : 별도의 안내 메세지 없이 LandingPage로 이동시킨다.
이와 같은 action을 dispatch를 통해 전달시켰다.
2. App.js에 auth 기능 적용
위와 같이 구현한 auth 기능을 적용하기 위해 app.js를 수정한다.
import React from 'react';
import {
  BrowserRouter as Router,
  Switch,
  Route,
  Link
} from "react-router-dom";

import LandingPage from './components/views/LandingPage/LandingPage';
import LoginPage from './components/views/LoginPage/LoginPage';
import RegisterPage from './components/views/RegisterPage/RegisterPage';
import Auth from './hoc/auth';

function App() {
  return (
    <Router>
    <div>
      {/*
        A <Switch> looks through all its children <Route>
        elements and renders the first one whose path
        matches the current URL. Use a <Switch> any time
        you have multiple routes, but you want only one
        of them to render at a time
      */}
      <Switch>
        <Route exact path="/" component={Auth(LandingPage, null)} />
        <Route exact path="/login" component={Auth(LoginPage, false)} />
        <Route exact path="/register" component={Auth(RegisterPage, false)} />
      </Switch>
    </div>
  </Router>
  );
}

export default App
위와같이 Route의 component에 Auth()를 추가한 후 component와 option값을 인자로 넘겨주면 된다.
LangingPage의 경우 아무나 출입이 가능하므로 option에 null을 넣어주었다.
LoginPage와 RegisterPage의 경우 login한 유저는 출입이 불가한 페이지이므로 option에 false를 넣어주었다.
3. 각 Page.js 수정
위의 상태에서 프로그램을 실행시키면 오류가 발생한다.

이를 해결하기 위해서 각 Page.js에 해당 내용을 추가한다.
// RegisterPage.js 수정 예시

import { withRouter } from 'react-router-dom';

// export default RegisterPage;를 아래와 같이 수정
export default withRouter(RegisterPage);
결과
결과 확인을 위해 임의로 로그인한 유저가 로그인한 유저는 출입이 불가한 페이지에 접근할 때 안내메세지를 띄우도록 하였다.

로그인을 한 후 LoginPage에 접근하려 했을 때 다음과 같은 안내 메세지를 확인할 수 있었고 안내 메세지의 확인 버튼을 누르자 LandingPage로 돌아가는 것까지 확인하였다.
'React' 카테고리의 다른 글
| Recoil 사용하기 (0) | 2022.03.11 |
|---|---|
| react-dropzone - 이미지와 동영상 파일 업로더 라이브러리 (0) | 2021.08.15 |
| boilerplate(client) - 로그아웃 기능 만들기(reactstrap 적용) (0) | 2021.06.22 |
| boilerplate(client) - 회원가입 기능 만들기 (0) | 2021.06.21 |
| boilerplate(client) - 로그인 기능 만들기(2) (0) | 2021.06.21 |


댓글